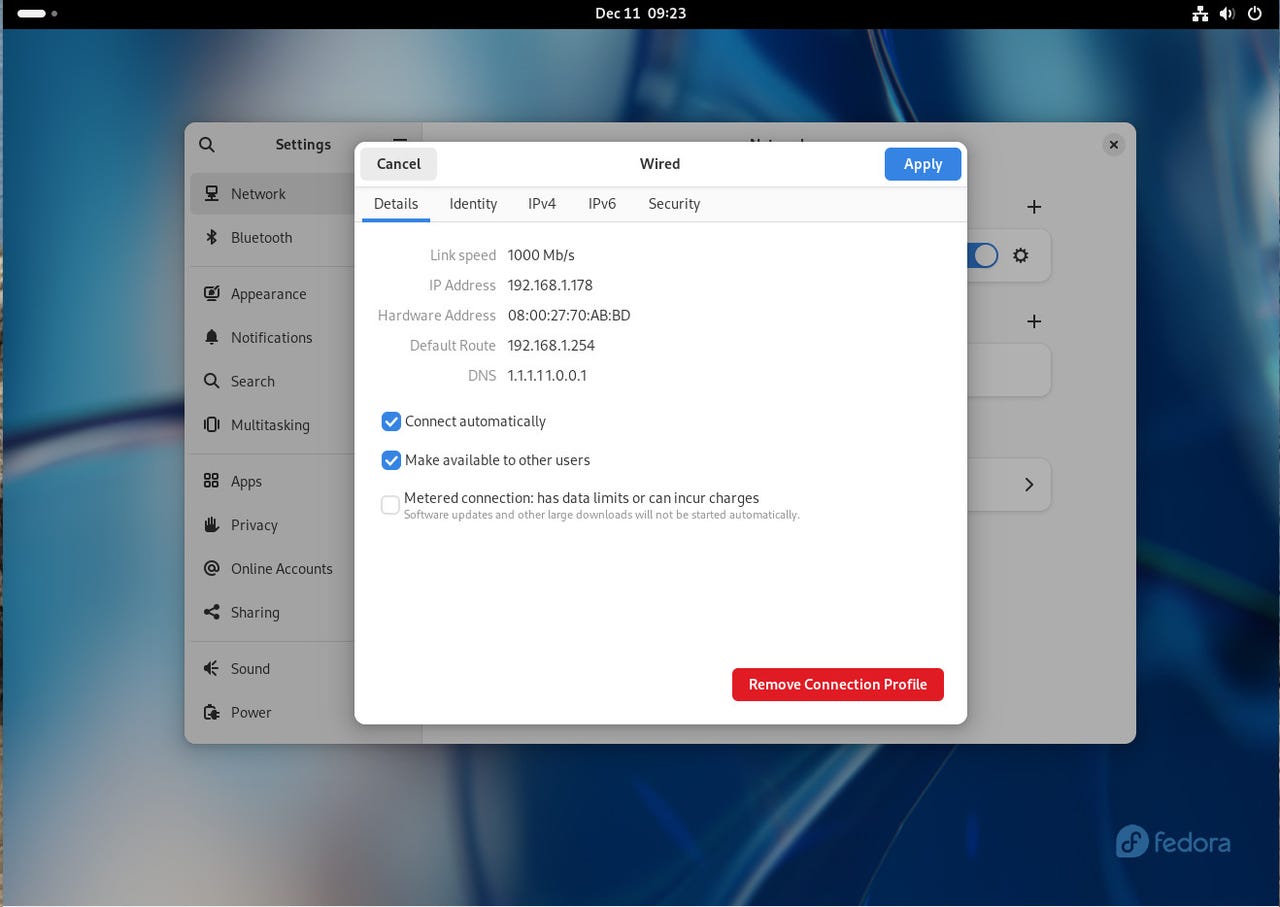
I’ve changed the DNS servers to those of Cloudflare on Fedora 39 with the GNOME desktop. Jack Wallen/ZDNET
Your Internet Service Provider (ISP) probably has your DNS configurations pointing toward the router/modem for your network (such as 192.168.1.254). That’s a perfectly legitimate set up and it more than likely works just fine.
But does it … really?
Also: AI in 2023: A year of breakthroughs that left no human thing unchanged
You might find networking isn’t quite as speedy as you’d like. Every time you open your web browser and search for something on google.com, the results take a while to appear.
Or you might recognize that standard DNS servers are unencrypted: If anyone is capable of viewing your web traffic, they could discern what you’ve been searching for.
That, my friends, is an invasion of privacy (at best) — or a prelude to getting hacked.
To improve your speed and security, there’s one very easy change you can make: Use different DNS servers. For example, both Google and Cloudflare offer very fast DNS servers that are also encrypted. Personally, I prefer Cloudlare’s option (because I’ve always found their DNS servers to be slightly faster than Google’s).
Also: How to configure specific DNS servers on your Chromebook
My goal is to walk you through the steps involved in changing DNS servers on the various operating systems (and/or desktop environments) that I use personally. This time around I’ll illustrate how it’s done on a GNOME desktop. It doesn’t matter if you’re using the GNOME desktop on a Ubuntu- or Fedora-based distribution. If it’s GNOME…it’s GNOME.
Let’s get to the change.
How to change DNS servers on a GNOME-based Linux distro
What you’ll need: The only thing you’ll need is a working GNOME desktop environment. Of course, that desktop will need to be connected to the internet (otherwise, you wouldn’t need to set the DNS servers). I’ll demonstrate this on Fedora 39 with the latest version of GNOME.
After logging into your GNOME desktop, click the network icon in the top-right corner and you’ll see the Wired Quick Settings tile. Click to expand that entry and then click Wired Settings. If you’re using wireless, it will be listed as such.
The GNOME Quick Settings section gives you quick access to various configurations. Jack Wallen/ZDNET
In the resulting window, click the gear icon associated with the Wired connection.
Make sure to click the gear icon associated with how you connect to the internet (either Wired or Wireless). Jack Wallen/ZDNET
In the next window, click the IPv4 tab and then click the On/Off slider associated with DNS until it’s in the Off position. Next, type the primary and secondary DNS servers you want to use (separated by a comma). For instance, if you want to use Cloudflare’s DNS, that would be 1.1.1.1,1.0.0.1. If you’d rather use Google’s DNS servers, those would be 8.8.8.8 and 8.8.4.4. Once you’ve taken care of that, click Apply to save and dismiss the window.
I opt to go with Cloudflare’s DNS servers. Jack Wallen/ZDNET
Also: How to turn on Private DNS Mode on Android
Back at the Network Settings window, click the On/Off slider until it’s in the On position to activate the changes. If you find the slider is already in the On position, slide it until it’s in the Off position and then back to the On position. Your new DNS servers should now be in play, giving your DNS query speed and security a slight boost.
Congratulations. Next time around, we’ll do the same thing with the KDE Plasma desktop.
Networking


