If you work with Linux servers, then you’d probably like to keep track of those machines from a single location. However, you probably don’t want to install a challenging application or service to make this happen.
That’s where the likes of Servercat come in. Servercat can be installed on either macOS or iOS and makes it easy to see how your Linux servers — and even your containers — are performing. By taking advantage of standard SSH connections, you can connect as many servers as you like to Servercat and keep track of them with a well-designed UI. Servercat also allows you to keep tabs on container performance and shows metrics like:
- Memory used
- Storage used
- Running processes
- Networking statistics
- CPU percentage
- Partitions
The free version of Servercat allows you to view container stats, whereas the paid version ($5.99 annual or $17.99 lifetime) adds an SSH terminal, batch execution, snippets, and iCloud sync.
Let’s get Server cat installed and see how easy it is to connect it to a Linux server.
Installing Servercat
I’ll be demonstrating on macOS Monterey, but the process should be the same regardless of which version of the OS you use. Here’s how simple it is to install Servercat:
-
Log into macOS
-
Open the App Store
-
Search for Servercat
-
Click Get
-
Click Install
-
When prompted, type your user password
The installation should finish without a problem.
Adding a server to Servercat
Open Servercat from Launchpad. When the app opens, click Hosts from the left navigation (Figure 1).
Figure 1
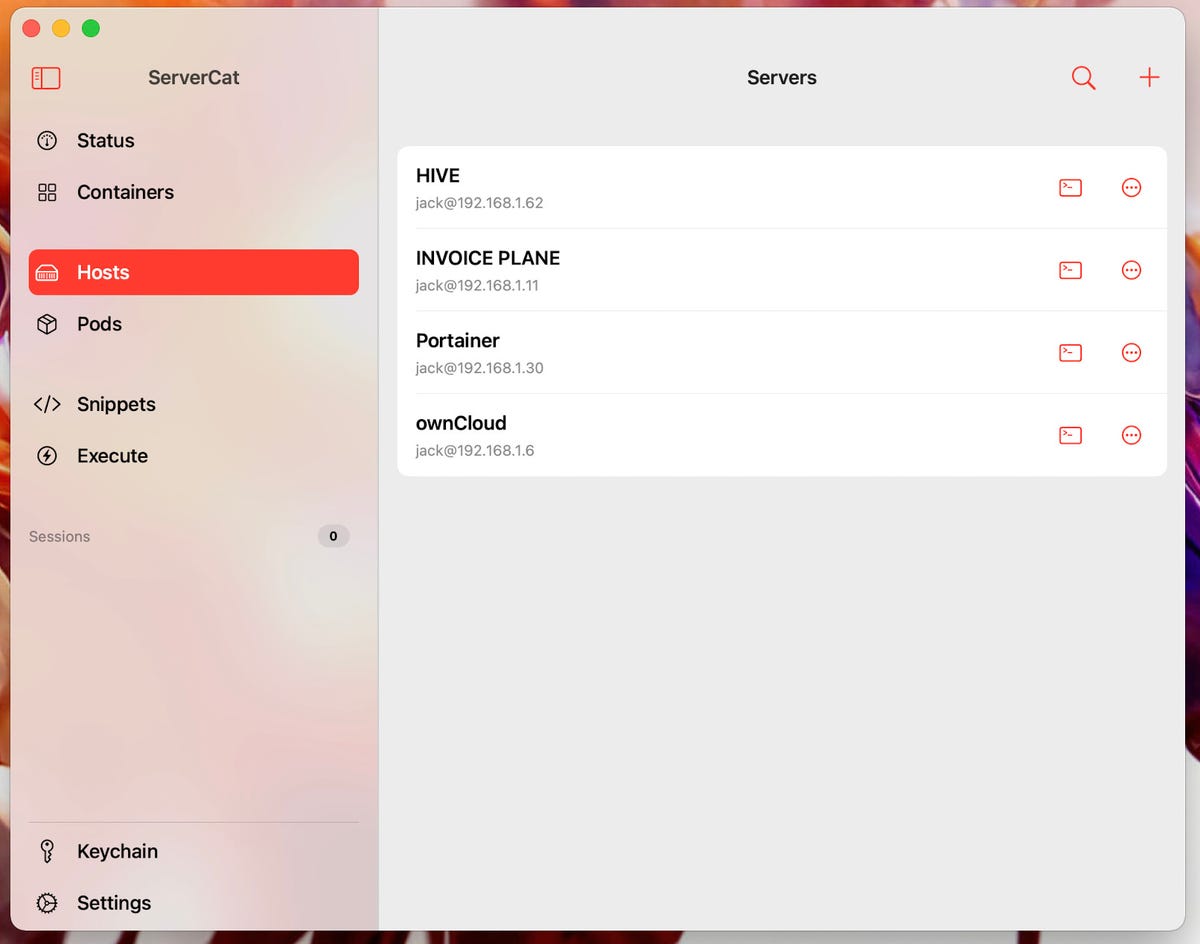
The Servercat Hosts section is where you add new servers.
Click the + button in the upper-right corner and, when prompted (Figure 2), fill out the necessary information for the host.
Figure 2
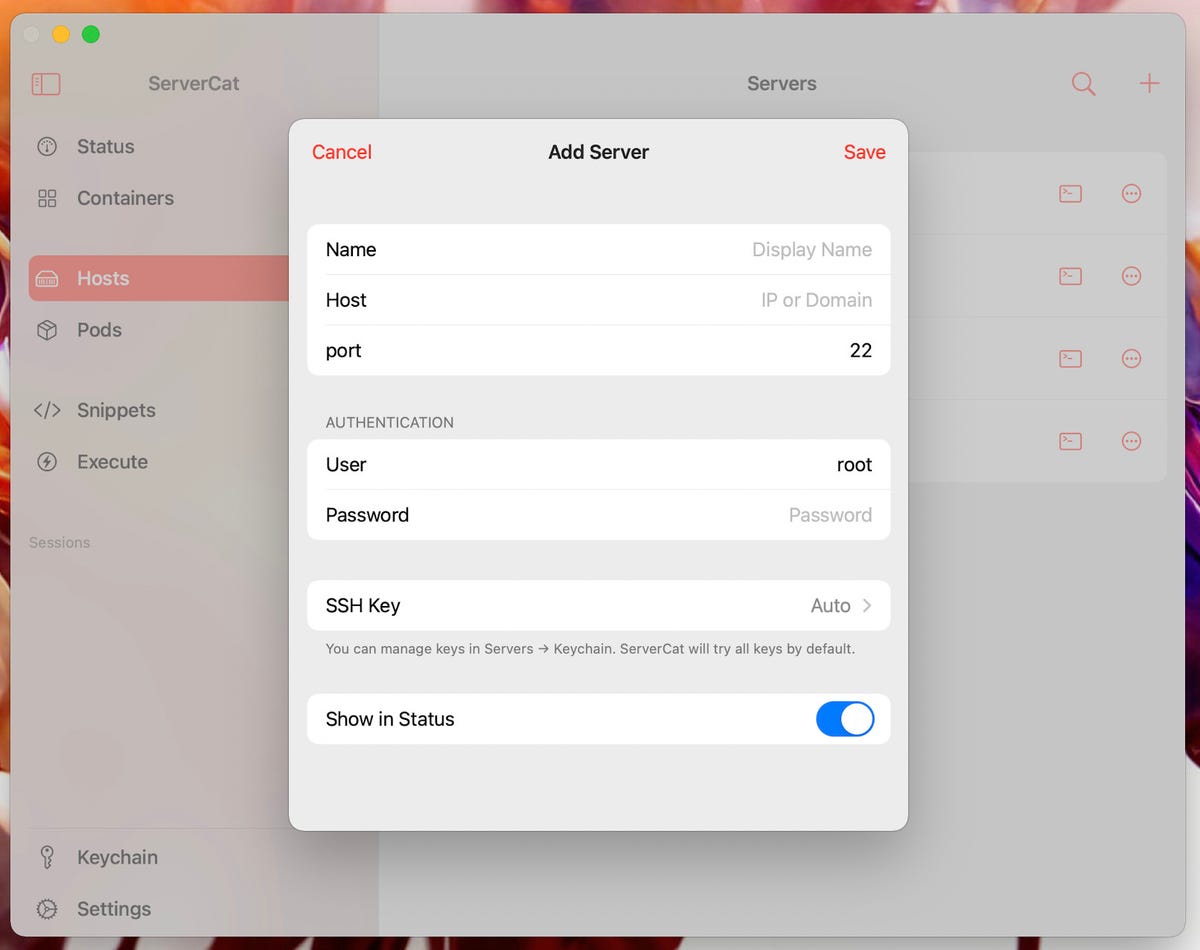
Adding a new host to Servercat.
Once you’ve filled out the necessary information, click Save and the host will be added. Click on Status, and you should see it listed (Figure 3).
Figure 3
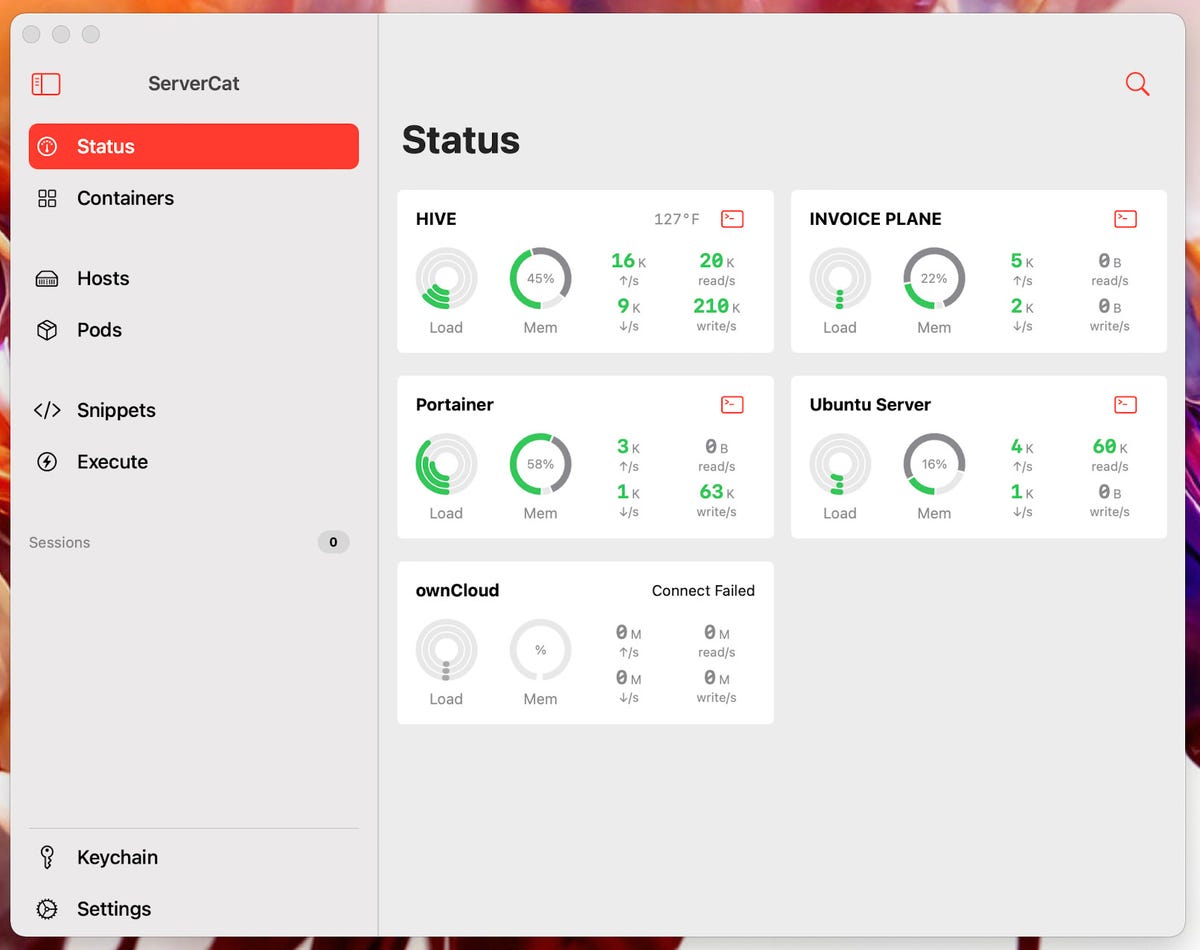
I’ve added the Ubuntu Server host to Servercat.
If you double-click that host, you’ll see even more information listed (Figure 4).
Figure 4
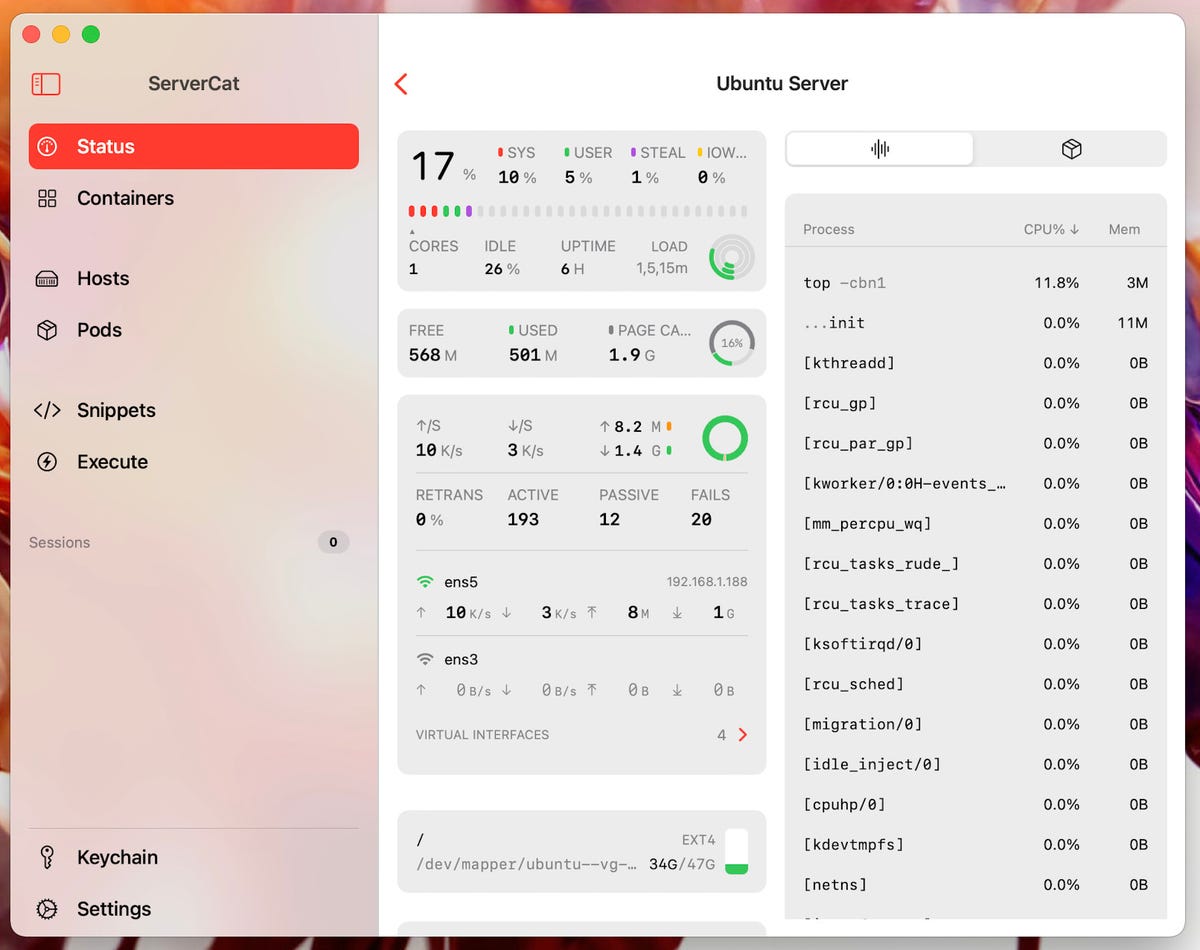
Viewing the extended information for the Ubuntu Server host.
If a host is used for containers, you won’t have to do anything extra. Just click Containers, and you’ll see all of the information available to you (Figure 5). If you’re using the free version, that’s the extent of the container options available.
Figure 5
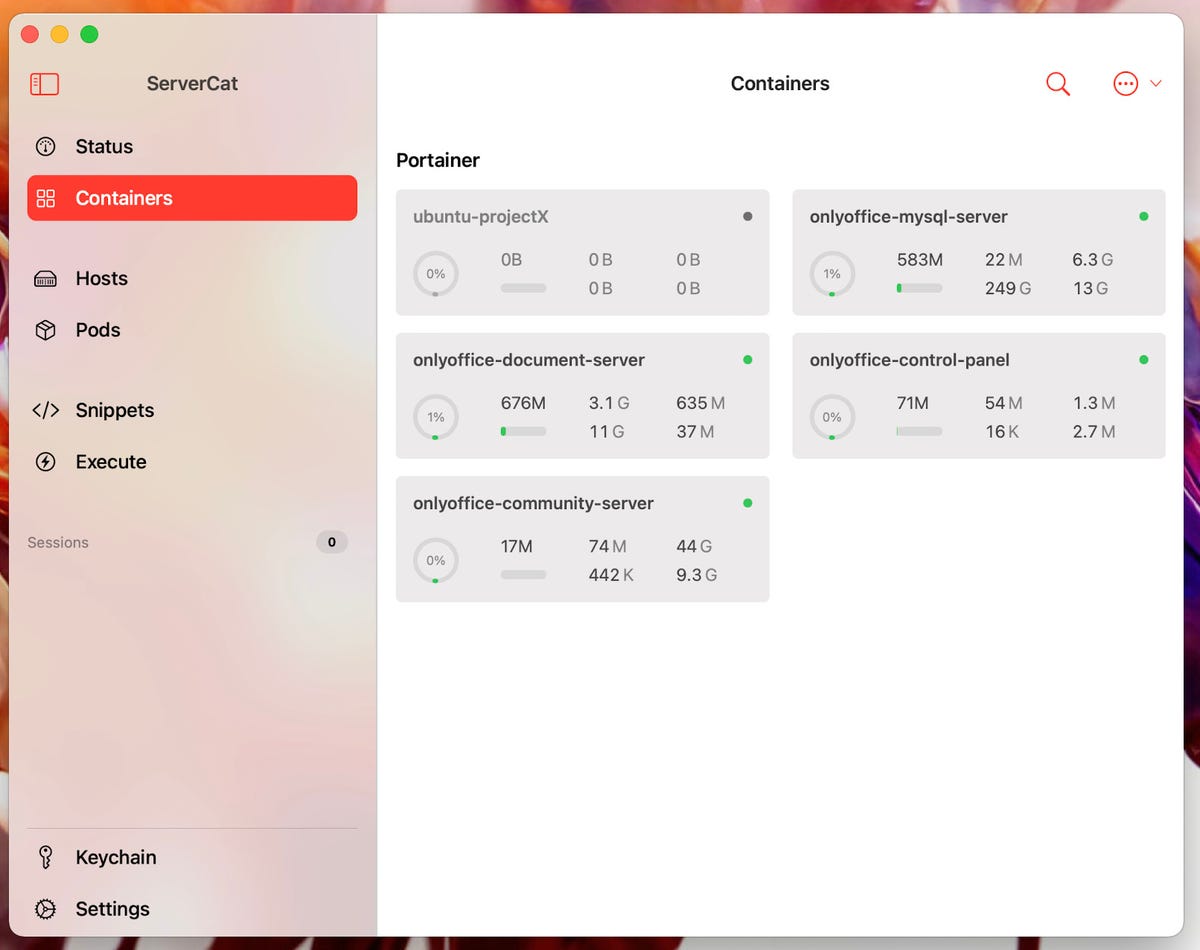
Viewing the status of containers found by Servercat.
And there you go, you’ve installed Servercat and can now keep track of your Linux servers. Keep adding hosts to view and, if you find the tool to be of value, consider purchasing the premium version so you can even manage your Docker containers from this handy application.


