Ten years ago, if you were to ask me if I was good at using power tools, I would have answered: “No.”
If it had to do with building a PC, I was golden. My favorite power tool was a powered screwdriver. I was a wire snipping god. And I’d learned to use a soldering iron at a local Heathkit store before I learned to drive. Basically, tools for electronics: Good. Real power tools: Not so much.
My friends (and even my wife) were so wary of my touching power tools that, if I even hinted at it, they’d find someone skilled to keep me out of trouble.
Evolution of a maker
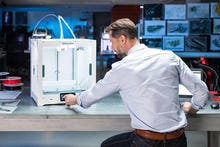
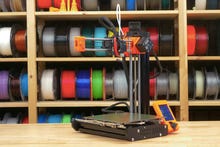
Fast forward to 2015, when MakerBot sent me the first 3D printer I ever saw. When it printed out its first part, a test print of a small chain that printed in place, I was convinced I’d seen the future. Initially, I contented myself with printing out pre-built objects, mostly downloaded from Thingiverse. But, eventually, I decided I wanted a custom bracket.
I wanted to be able to hang my Bluetooth headphones, fan control, and a few other remote controls from the back of a TV near the couch. I wanted something totally custom and totally tailored to my needs. Although it took a bunch of fits and starts, I eventually designed my bracket and printed it out. It hung proudly for years.
That was my first taste of wanting something custom 3D printed, and making it happen.
When it came to software, I was very comfortable with think-it-make-it. But real-world objects? Never. Not until I got my first taste with that 3D printed bracket.
After that, I designed and built a whole bunch of custom-made 3D objects. I made a dough roller holder for my wife. I also made a special doll stand for her. I made a couple of special holders that held gear in the YouTube studio. I made a monitor riser that raised my second monitor to exactly the height of my main monitor. And on and on and on.
You can see some of the simpler projects in my practical 3D prints series. All told, I’ve built 18 projects using TinkerCAD, 30 projects using 123D Design (which has since been discontinued), 37 projects using Fusion 360, and two using SketchUp. Many were super-simple, just to solve a very minor issue.
For example, I made a magnetic flag so our mail would be picked up — that was just a rectangle, two triangles, and two circles. I made holders for shelves. I fixed my vice ends using a simple cylinder and ball. The point is, for the past five years or so, when my wife or I have seen a need, I have often been able to solve it because I’d become a 3D printing maker.
My 3D printing projects have made me comfortable with the idea of solving physical, real-world problems with things I can make. I have started to think about large builds involving other maker technologies, including laser cutting, metal, and wood.
COVID-19 and customization
When the pandemic hit, it became impossible to go over to a friend’s house for help with a project or get a contractor to come here for home improvements that needed to be made.
More and more of us have been working and learning from home. For the past year, we have become responsible for doing our own maintenance, fixing, and customizing. COVID-19 isn’t permitting us to bring in the typical helpful friends or contractors we “not so handy” folks might otherwise have been able to recruit.
Many of us, having spent the last year at home, have reached the point where it’s become clear that customizing and optimizing our environment is appealing — and often necessary to productivity.
Remember, once you start working from home full time, your residence also becomes a shop, a warehouse, an office, and a lab. Making it all work and still keeping the family dynamic pleasant often requires some level of customization.
The tools we’re going to need to use go beyond the typical torx screwdriver set. We’re going to need to use things like track saws, sanders, router tables, hacksaws, and more because we’re building and fixing things that don’t begin and end with 3D printed plastic or fit inside a PC tower case.
Making for work: Some examples
To illustrate the kinds of projects you might find yourself doing, I’ll take you on a quick tour of six problems I needed to solve and talk about where I recruited shop tools to help out.
1. Making a VESA adapter fit a monitor
Tools: hack saw | belt and disk sander

I received a brand new curved monitor to replace the 12-year-old beast that just died. This monitor belongs on a rolling cart in my studio and is mission-critical for webcasts and other broadcasts.
But the VESA adapter on the stand didn’t fit the cutesy little designed space on the back of the monitor. Oh, the VESA holes were all in the right place. But there was not enough room for the corners of the actual VESA metal adapter.
Fixing this took a handheld hacksaw because the cut had to be precise and controlled. Then, I ran it through my Harbor Freight belt and disk sander. The heavy grit of the paper allowed me to grind curves in the 18 gauge steel in the bracket.
2. Extra shelves
Tools: 3D printer | table saw | track saw | miter saw | sander
I did a video on this. I needed more storage and the shelving units had very wide, unused gaps between shelves.
This was a hybrid project. I thought about asking the Home Depot folks to do the cut, but the pandemic restricted my movement, and besides, the cutting down at the home center tends to be very fast and often inaccurate.
I 3D-printed special mounting brackets, but because I wanted the shelves to fit, I used the table saw and the track saw to cut down the shelves from plywood sheets.
3. Vent screen to exhaust laser cutter fumes
Tools: disk grinder | power drill | hammer | screwdriver | caulking gun

The laser cutter creates some pretty nasty fumes that needed to be vented out a window. I bought a fitted vent adapter for the window but needed to cut it down to fit.
It took an afternoon of persuasion to get it all to fit, but once I removed some of the metal, it all worked. Then it was a matter of fitting it to the window, pre-drilling holes so the window trim wouldn’t crack, screwing the vent in, and caulking the whole thing to prevent leakage.
4. Protective cover for teleprompter
Tools: table saw | pocket hole screw jig

A teleprompter is basically a couple of sheets of fragile glass held together by bits of plastic and screws. My teleprompter has the dual-whammy of being both fragile and ungainly, making it very hard to store, and even harder to store safely.
But I had a bit of scrap plywood left over, so I cut a few boards, screwed them together with a pocket hole jig, and mounted the protective box to the side of my storage cart. The teleprompter slides in and is safe inside the quick little cubby I made.
5. Shelves for holding 3D printers
Tools: Jigsaw | drill | power screwdriver | hammer | sledgehammer
Imagine my surprise when I bought a bunch of steel carts for the 3D printers being tested in the Fab Lab. There was no top and no shelf. The vendor sold the skeleton of the cart but expected the buyer to go out, cut, and attach the shelf to the cart bones.
I had Home Depot cut the shelves, and they were close in size. But it turned out that in order to make the shelves fit, I needed to cut out little notches at the corners. I tried just bashing the shelves in with a sledgehammer, but that didn’t work. “Hulk smash” has long been my strategy for fixing things, but I’ve been finding it doesn’t always work. So, I wound up buying my first jigsaw to make this happen. There’s a whole video on this project.
A few years later, I needed a lower shelf on a wire cart to hold some resin printers while they awaited testing. I cut down a piece of wood, and again, used the jigsaw to cut some notches.
6. Cable organizer
Tools: Dremel saw | Dremel tool | Dremel router attachment | drill | pocket hole jig | clamps
Finally, there’s the biggest shop project I’ve done to date: what I called the Ultimate Cable Organizer. For years, I used a set of rickety plastic drawers from the thrift store to hold all my cables, but like the Leaning Tower of Pisa, it got worse every year.
So, with the help of Fusion 360, Dremel, and Kreg, I screwed up my courage and built a custom-made cable organizer. It took a few months from start to finish, but I’ve never had my cables more organized or easier to find. I love this thing — and the rush is I built it.
Wrap up
My point in all this is that it’s probably time to let some power tools and shop tools into our lives. I lived for many years with the assumption that while I was fine with electronics, anything else was beyond my capabilities.
Over the past few years, I’ve been slowly building up my shop and my skills. I only buy a new tool when I have a specific project that demands it. Once I add new tools to my collection, I keep finding other options and opportunities for their use.
For example, without the belt and disk sander (which I bought for a different project), I never would have been able to hang my new monitor on my mobile stand. But since I already had it down in the garage, all I needed to do was be careful, think it through, and then make it work.
Making it, and making it work is what this column is all about. It’s not just the work itself. I can’t begin to tell you how empowering it feels to actually be able to make things I need.
Take it slow, be super careful, watch a lot of YouTube for tips and techniques. But if you simply work on one project at a time, solving one small problem at a time, you’ll soon find yourself far more confident in your ability to think-it-make-it. And that rocks!
You can follow my day-to-day project updates on social media. Be sure to follow me on Twitter at @DavidGewirtz, on Facebook at Facebook.com/DavidGewirtz, on Instagram at Instagram.com/DavidGewirtz, and on YouTube at YouTube.com/DavidGewirtzTV.


