Education takes on all forms. There’s traditional K-12, college, corporate communication and training, specialized online resources, and even YouTube. In this back-to-school guide, I’m not going to limit my suggestions to one discipline of education.
I’m also staying away from software recommendations because teachers need a lot of different types of software, but much of that is dictated by the school district. Teachers need students with access to computers and bandwidth, however, and there’s a big digital divide issue. Many school districts are requiring at-home teaching but are not providing an equipment allowance, so the things I’ve recommended will likely to be an out-of-pocket expense for you.
That said, this is a guide to help you up your game. Where possible, I’ve kept my suggestions within a reasonable budget. For example, you can add an entire green screen kit — with the backdrop, stands, and even the lights — for under $100. I’ve included budget options because you don’t have to have the best gear to get your thoughts and lessons across.
When I studied for my Master’s degree in education seven years ago, my thesis was a quest to discover the optimal online video learning experience for the most effective lesson retention. Here’s the TL;DR of my results: It wasn’t about gear. Learning retention, whether online or not, is all about the quality of the lesson and the resources that support learning. It’s not about having the best cables, microphones, lights, and cameras.
Let that be an encouragement to all the teachers out there faced with sudden immersion into the world of online learning. Sure, it’s nice to have great equipment (and never underestimate the importance of good sound), but you don’t have to have a blinged-out studio to impart knowledge across the internet.
Before we jump into the list, I want to give you one more word of caution: Online teaching jumped from a niche practice to a must-have in just five months. When the pandemic hit, gear became in outrageous demand, and that means a lot of name brand stuff was out of stock. It also means unscrupulous folks were scalping and gouging on price. That seems to have settled down since then, but keep alert. Do not spend extra to get your gear. Either wait or find a lower-cost alternative (which I’ve suggested throughout this piece). Don’t give in to the crooks who want to profit on your mission to keep educating, even from home and even in a pandemic.
And now, the gear…
Blue Yeti USB mic
How you sound is your top priority
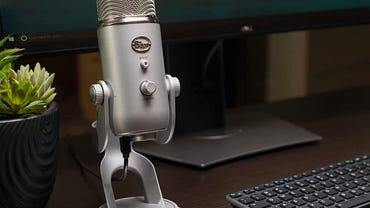
You may think that teaching over video requires ideal video quality, but it’s actually sound quality that matters the most. You can get by with lower frame rates and even pixelated video, but if your sound is annoying, folks will tune you out immediately.
I’ve been using the Blue Yeti for years and it produces good quality sound reliably. It comes with a number of different pickup patterns, which gives you a bit of versatility in how you use it. The included stand stood me well for years, but I recently upgraded to a boom arm, which I’ll show you in a minute.
Buying hint: These are in and out of short supply due to the pandemic. If they’re out of stock in one color, look for another color. Also, don’t let the price gougers get you: this should run about $130 or so, new.
Budget option: You can get by with something simple like this budget headset for under $10. It gives you an adequate mic (who are we kidding here?) a headset speaker, and because it’s over-the-head, you don’t need to worry about a stand.
Pros
- Reliable
- Rock-solid
- Always did the job for me
Cons
- Sometimes sold by price gougers
- You either like the look or you don’t
RODE PSA 1 microphone boom arm
Solid boom arm with reasonable reach
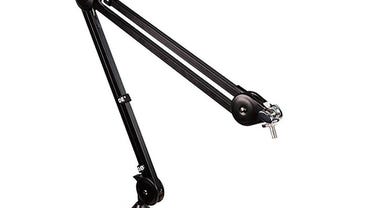
If you’re spending long hours in front of your mic, you want the mic to come to you, rather than you having to hunch down to reach the mic. Trust me on this. Your back will thank you.
I’ve used this RODE microphone arm for years. In fact, I have two of them. There’s not much all that exciting to say except it works and has never let me down.
Alternate option: The Rode mic stand goes in and out of stock. An alternative of similar quality is the Blue stand, which pairs nicely to the Blue Yeti I just recommended.
Budget option: See my note for the mic headset above. You won’t need a budget boom arm (and you kind of don’t want one, because the last thing anyone wants in the middle of a meeting is to have their mic come crashing down — don’t ask me how I know).
Pros
- Gets your mic up off your desk
- Good for making sure your sound is just right
- These models are solid and can support the weight
Cons
- This type of stand often gets in the way when not in use
- They need to be able to clamp to your desk
Microphone pop filter
So you don’t make poofing sounds with P words
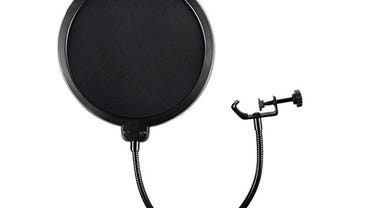
Peter Piper, who picked a peck of pickled peppers. Let’s leave out the question that’s baffled me since I was three: How does one pick a pepper that’s already pickled? Instead, let’s just focus on the poof of air that comes out of your mouth when you begin a word with “p.” Microphones pick that increase in air pressure and magnify it to the point where it’s very annoying to listen to.
The solution is easy. Add a pop filter. There’s no magic to which to use, but I’ve found this type quite convenient. It’s a relatively low added expense for the benefit it provides.
Pros
- It makes your “p” sounds sound better
- Inexpensive fix for a relatively big problem
Cons
- It can be a pain to mount to your mic just right
Sennheiser headphones
So you can hear yourself and guests
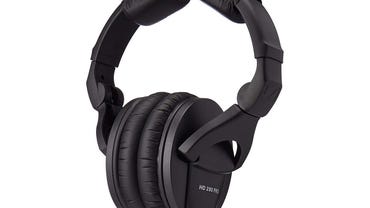
I use two different kinds of audio monitors depending on whether I’m on camera. When I’m off camera doing a webcast or radio interview, I use these cans. I also use these in zoom chats, because I can hear better and how I look on screen isn’t as critical. They’re nice, high-quality headphones that won’t break the bank. Because they’re black without any bling, they’re also unobtrusive if you do need to use them on camera.
The “other kind” I mentioned is next…
Pros
- Good quality sound
- Comfortable
- Reasonable for premium brand
Cons
- You can find nearly-as-good more inexpensive solutions
- They are unmistakably ugly (as are any full-head cans)
- Monitors only; no mic for gaming
Unobtrusive in-ear monitors
Avoid Princess Leia hair
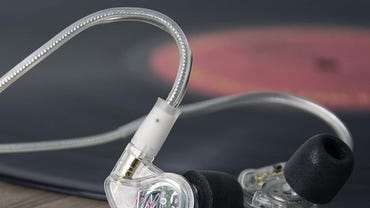
When I’m on camera in a shoot where the video quality counts, I use these nearly-transparent in-ear monitors. While they don’t tunnel the sound as well as the bigger Sennheisers, they don’t stand out on screen. They do help isolate noise and I’ve found they can be adjusted to fit reasonably well, a challenge many other ear buds have failed at miserably.
Pros
- Almost invisible on screen
- Can be adjusted to fit
- Sound quality is…tolerable
Cons
- Sound quality is far from fabulous
- The kit of tiny little extra parts is a bit overkill for what it does
Logitech BRIO 1080p webcam
Are you ready for your close-up?
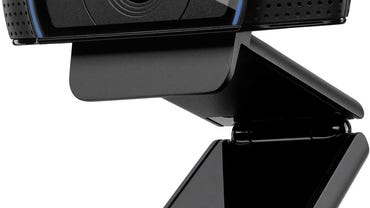
So, here’s the thing. I usually use Logitech webcams. However, they’ve been hard to get ahold of since the entire world went virtual a few months back. If you can find them, and sellers aren’t gouging for price, a nice c920x is a win.
The fact is, the c920 series is the benchmark webcam. It’s used everywhere, and while some Logitech software sometimes has its ups and downs, you can be pretty sure that if your software supports webcams, it specifically supports this webcam.
One final webcam hint: Just because your webcam can do 1080p or even 4K doesn’t mean you need to Your upload bandwidth is likely to be considerably lower than your download bandwidth, so you may want to go with 720p at 15 frames per second. Most home cable feeds can handle that, but not much more.
Premium option: The Logitech BRIO is nice, but it’s generally overkill for Zoom meetings. Plus 4K takes a lot of upload bandwidth, so you may be dropping it down to c920 levels anyway.
Budget option: Your laptop and phone both come with cameras. Use them and save some money.
Pros
- Supported by just about everything
- Reasonable video quality
- Solid and reliable
Cons
- Logitech webcam software can be frustrating
- Sometimes hard to get; watch out for price gouging
Amazon Basics tripod
Mount your webcam on it and say “cheese!”
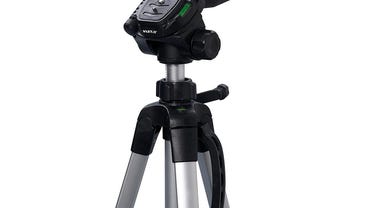
Turns out tripods are popular in pandemic times. The Amazon Basics version of this thing is no longer backlogged months. But it’s still a buck more than this roughly similar tripod. If all you’re supporting is a webcam (and possibly a lightweight teleprompter), all you need is a basic tripod.
This one fits the bill. I like the fact that it’s got a quick release camera mount as well as quick release legs. It comes with a smartphone adapter and a bag. What else is there to say? It’s a tripod.
Budget option: This tripod is pretty budget all on its own, but if you want to go real basic, pile up a stack of books. Tape your camera to a folding ladder or the back of a chair. Hot glue it to a shelf. I’ve done all of these and they do work. Just not as conveniently as a tripod.
Pros
- Cheap enough
- Added smartphone adapter
- Comes with a bag
Cons
- Do not use this for heavy filming rigs
- Limited to four pounds of load
- No center hook for hanging a stabilizing weight
Self-adhesive acoustic panels
Because bedrooms aren’t sound studios
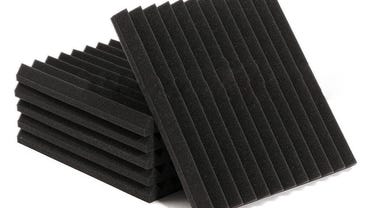
When I set up my first studio in a 9×10 foot spare room, the audio was terrible due to the reflections from the small space and hard surfaces. Acoustic panels saved the day. They’re just one of many options to blunt the sound, so there are other choices, but these might get you started.
Budget options: Raid your attic and linen closet. Find old moving blankets, comforters, fuzzy blankets, anything soft that can blunt the noise.
Pros
- Better sound is more important than you might think
- Easy to put up
- Relatively inexpensive
Cons
- Adhesive backing may damage your paint
- You may need a lot more of these than you want to buy or put up
- They don’t really fit into room decor
Blackout curtains
Acoustic panels alternative plus light management
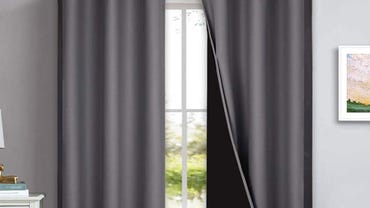
When I moved into our new house, my office had the hard surfaces problem I had in other homes, but it also had a brutal afternoon sun that screwed up my video lighting. Blackout curtains came to the rescue. They can be as expensive as acoustic panels, but because they’re quite heavy, they work great as sound buffers. Plus, they block out the light.
You can see how I used similar curtains to baffle sound in my studio office in this video.
Pros
- Many different colors
- Allows you to match your décor
- Doesn’t scream “sound baffles”
Cons
- You may need to put up curtain rods
- To use them, you have to block out natural light
- Might be a challenge to get if you have non-standard window sizes
Teleprompter
Teleprompters aren’t just for reading scripts
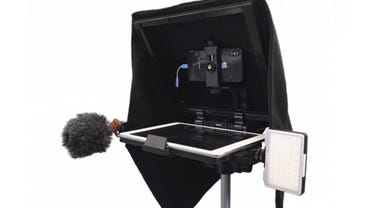
While teleprompters are great for reading scripts, I often use my teleprompters for reading notes without looking away from the camera. My biggest use of the teleprompter is to put the talking head of my guest or interviewer right in front of me, so when I converse with them while looking at them, my eyes are straight into the camera.
I actually own two of these Caddie Buddy teleprompters. One is in the workshop and one is in my upstairs studio. While they’re reasonably inexpensive, they’re also pretty solid and definitely do the job.
Pros
- You can use this to maintain eyeline to the camera
- Easy to setup
- Works with a standard iPad
Cons
- Cumbersome to store when not in use
- Relatively delicate with large sheets of glass
- Requires both iPad and compatible teleprompter software
Green screen kit
Green screen, lights, and stands for a great price
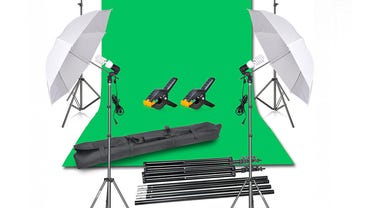
Let’s talk green screen, shall we? This is an up-your-game sort of enhancement, but if you can’t control your background and you want to look professional — and you can pull off the lighting — a green screen may be the way to go.
This kit is a great deal. It has all the stuff you’ll need, including lights and a stand. The only problem is that it might require a bit more space than you have available. When I started with my first green screen setup back in Florida, I had a very small space, so I used Autopoles and Super Clamps to hold my lights and I painted a wall in a tiny bedroom.
When I built out my temporary studio, I moved to a really cool extendable green screen background from Elgato. I’ll put a link to that below as well, but the kit I’m recommending comes with more than just the green screen. It comes with all the lighting you’ll need to make chromakey work, and for about fifty bucks less.
Budget option: You can also go with a simple background decorated from objects around the house. There’s no need to go through all the lighting and positioning challenges if you can simply carve a space with a good on-camera look. In this video on lockdown streaming, for example, all I did was put some of my accumulated geekiness on shelves that came with the house, and it looks pretty good.
Pros
- Can give you a much more professional look
- Full kit of lighting
- Includes floor covering so you can do full-body shots
Cons
- Requires a relatively large space to set up
- Can be finicky as heck to get right
- Takes a lot of space to store
Blackmagic ATEM Mini
For bringing in multiple video sources
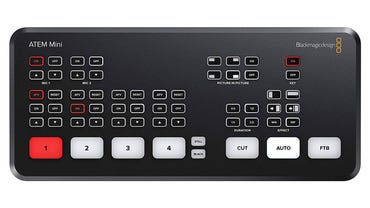
If you want to offload your green screen processing from your computer to something with a lot of chromakey smarts, consider the $295 ATEM Mini. This is the first of a growing line of ATEM Mini devices that offload professional video production to little boxes you can use to run your home studio.
Unfortunately, the $595 ATEM Mini Pro, which supports live streaming, is out of stock on Amazon (and is also subject to price gouging by scalpers, so be careful). Black Magic Design, the storied video gear company behind the ATEM line, also just announced two cool new products: the $885 ATEM Mini Pro ISO with built-in individual multi-stream recording capabilities; and the ATEM Streaming Bridge (which is more of a tool for pro broadcasters) that converts the ATEM stream back into professional video formats. Both will be available in August.
Budget option: Just use OBS on your computer to do all the processing and mixing. OBS is free, open source, very powerful, and always improving.
Pros
- This is a full switching system in a tiny box
- Has built-in chromakey processing
- Has many advanced controls via software
- Let’s any camera it supports emulate a webcam for Zoom and Skype
Cons
- It’s a bit of a complex setup
- Doesn’t directly take USB webcams as input sources
Gaffer tape
The single most important tool in the studio
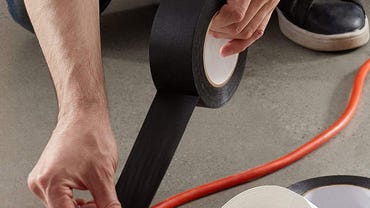
If you’ve never used gaffer tape, you’re in for a treat. This stuff is super-strong but doesn’t leave a residue. You can use it instead of clamps and brackets, and it allows you to make temporary yet permanent mounts for your gear. I’ve used gaffer tape to tape a camera to a ladder to approximate a tripod. I’ve used gaffer tape to tape down all the wires for my lighting. I’ve used gaffer tape to hold up backgrounds. I’ve used gaffer tape for so much more.
Budget option: You don’t need a budget option. A roll of this stuff is under $20 and will last for quite a while. Gaffer tape is definitely your budget option itself because it will save you on tools and gear expenses.
Pros
- Gaffer tape gives you superpowers
- You could probably use it to climb a tall building in a single bound
- It holds tight, removes easily, and doesn’t damage or leave a residue
Cons
- Not all gaffer tapes are created equal; some are great, others not so much, so try them and test
- There is addiction potential
- Once you use gaffer tape once, you’ll want to use it to fix everything
- It will ruin duct tape for you forever; gaffer tape is usually so much better
If I can only afford one of these items, which should it be?
I’d like to say gaffer tape, because it’s inexpensive and astonishingly versatile, but alone, it doesn’t up your on-air game. By far, the most important thing you can do is make sure your sound is good. People will put up with crappy video as long as the sound is clear. But people won’t tolerate bad sound even if your video is ideal. So that leaves three items recommended above. If your mic is crackling and scratchy, that would be your one thing. If you’re blowing out your Ps when talking, get a poof blocker. And if you’re getting weird room echos, get either curtains or acoustic panels. Sound is most important, but you have three paths to fix it.
I heard prices were sky high and gear tough to get. Is that still true?
As of August 2020, the prices on a lot of these items were hyper-inflated or they were completely unavailable. For example, the Logitech webcams were simply ungettable. The $150 Elgato green screen was going for $400 and $500. But in my last scan, most prices have come down to earth and there are a lot fewer folks price gouging. Of course, that may all change again depending on how our economy and the pandemic goes, but for now, I think you’re okay.
If I have Zoom, do I need a green screen?
Zoom does a great job of obfuscating your background, either blurring it out or replacing it. To give it the best chance, use a low-back chair that doesn’t peek up above your shoulders and do your best to reduce background clutter. In fact, for many Zoom meetings, a green screen and all the lighting it requires might be overkill.
So, there you go. Feel free to share your online teaching experiences, tricks, tips, and challenges in the comments below.


